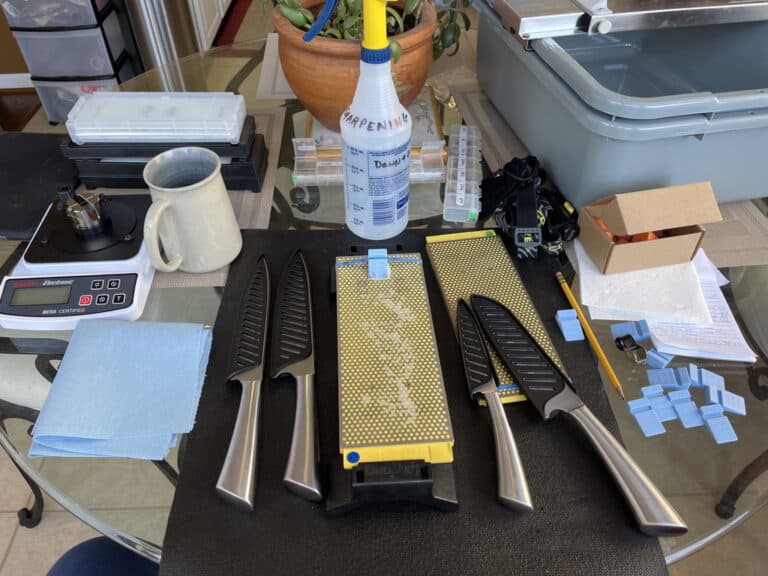
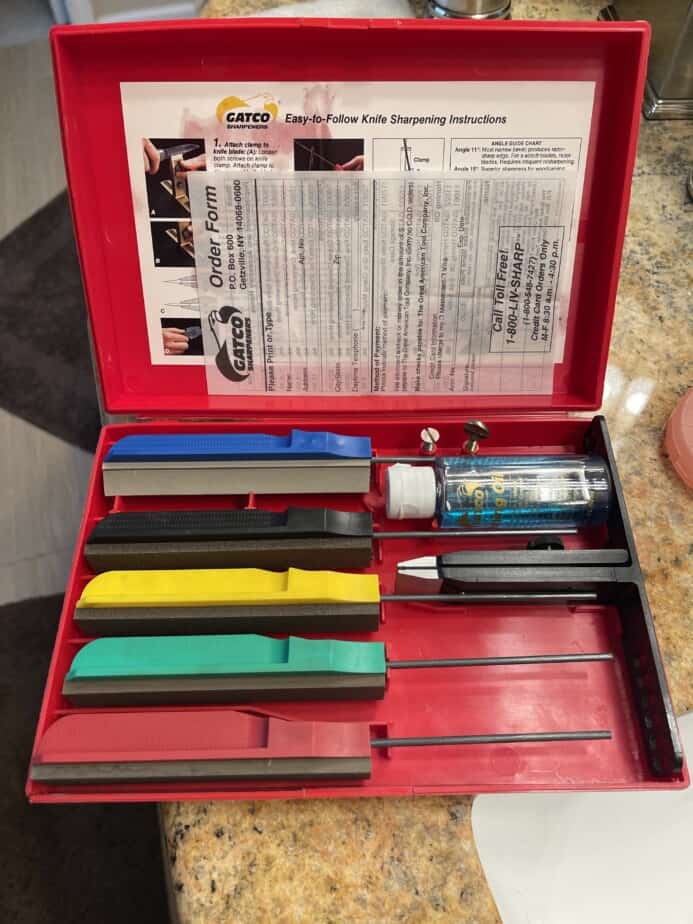
There are many types of knife excellent sharpening aids available to assist in helping even the most inexperienced knife owner maintain a consistent angle resulting in a sharper knife. One such fixed-angle system is the Lansky system. There are knock-offs that function nearly the same way. With this system, you clamp a fixture to the knife and it acts as a guide which helps maintain a fixed angle as your stroke your stones along the knife’s edge. It’s affordable and it’s effective. I have a Gatco version which is quite similar. One tricky thing to figure out is which of the preset angles to use for any given knife. Most times none of the available choices match up perfectly with the angle of your knife. So which angle should you choose? Here’s how to find your perfect sharpening angle using a Lansky knife sharpener.
Find Your Best Angle
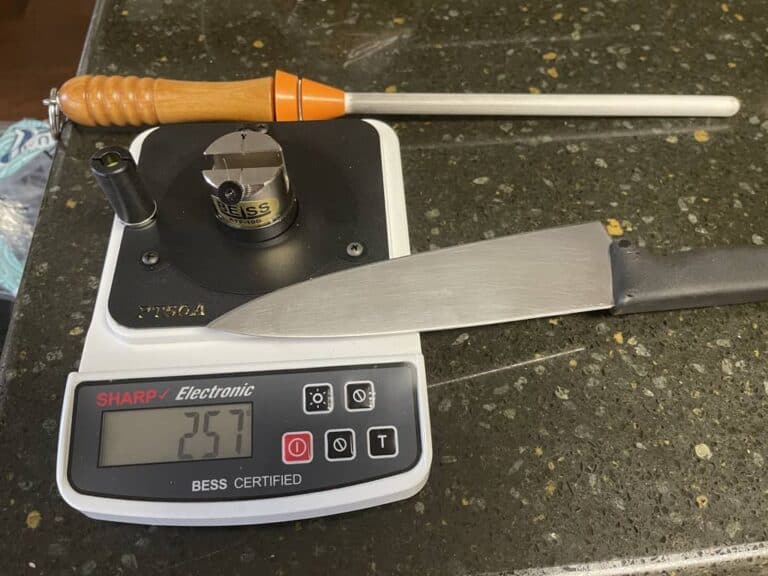
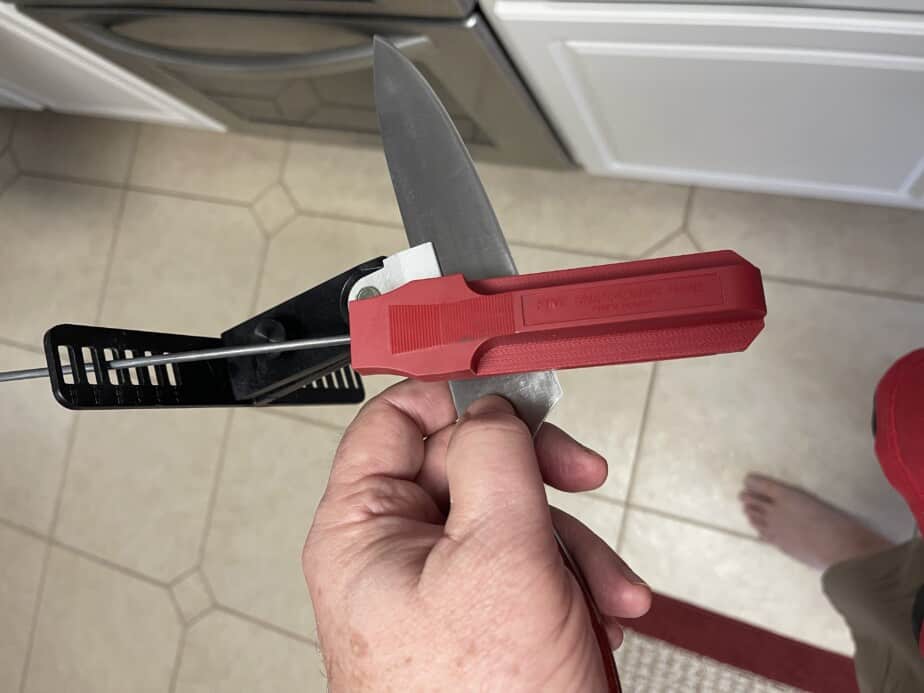
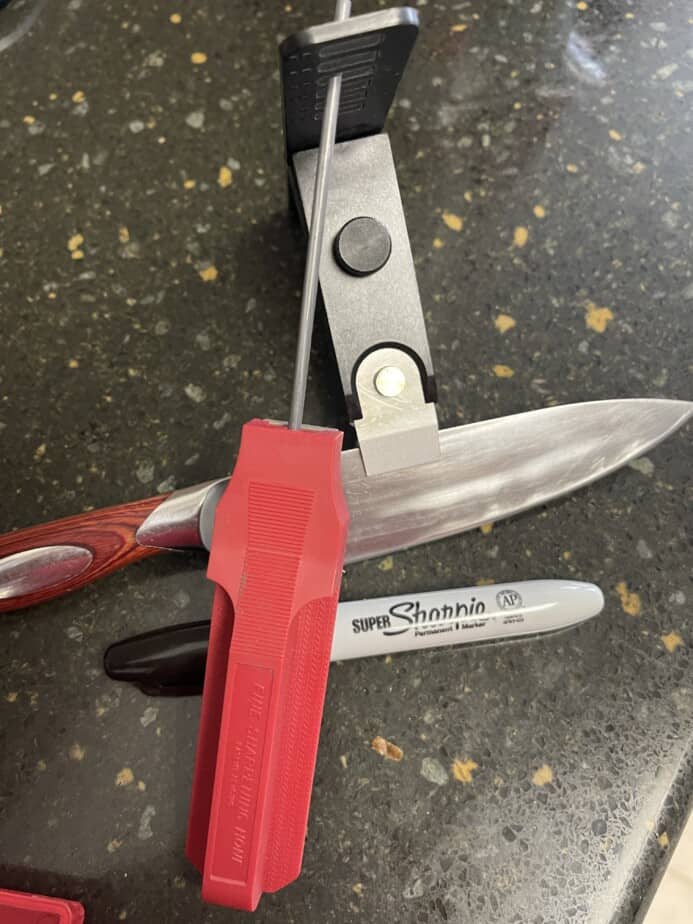
Whip out a sharpie (black felt tip marker) And paint the bevel edge on both sides of the knife. Wait about 10 mins for the ink to thoroughly dry. Now using a med or fine grit stone, take a few light swipes at the various angles until you find the angle that “most completely” removes the ink. That is going to be the best angle for quickly resharpening your knife. It’s unlikely to be perfect, so I would opt for the highest angle that fully reaches the apex or edge.
Create or Raise a Burr
Once you know your “best” matching angle, change to a coarse stone ( if the knife is really dull ), and using medium pressure, proceed to sharpen until you bring up a burr on side A. You need to fully raise a burr along the entire length of the blade before proceeding. Repeat on side B. Make sure you have a burr along the full length of the knife.
Once you have a burr on Side A, side B will raise a burr much quicker, using fewer strokes, but the bevel width can end up narrower and uneven. So be mindful of that. Each side should have a relatively consistent bevel width from heel to tip on a traditional V-bevel grind.
De-burr or Remove the Burr
Having a consistent bevel, and having raised a burr on both sides, it’s time to de-burr. Choose your method. My preference is would be the count-down method while gradually decreasing pressure. Then using the lightest pressure (like just the weight of the stone itself ) alternate sides 5-6 times using leading-edge strokes. On a Lansky, this means using only a single light “upward” stroke along the entire edge of Side A, then flip to Side B and repeat for 5 or 6 passes on each side. Your knife is now quite sharp if you executed the previous steps correctly. Do not proceed until you know your edge is very sharp and has no remaining burr.
Refine Your Edge
Now that your knife is sharp it’s time to refine your edge. If you performed the above steps properly, your knife should be VERY sharp right now using only the coarse stone.
You’ve apexed your edge, but it’s “toothy” and scratched looking. So, at this stage, on a kitchen knife, you refine the edge by progressing to finer stones in a progression of Medium then Fine grits if you wish. You’ve already sharpened your knife, so there is no need to raise a large burr again from this point! So the tactic changes to more of a burnish / polish than grinding. Use a medium-light pressure with progressively finer stones.
Now Progress to Medium Grit
Here is where you want to balance your strokes on each side until the coarse scratch pattern on the bevel is no longer visible and is replaced by the medium grit scratch pattern. Then use the count-down method again to start finishing up. Then, to be sure there’s no burr or foil edge, alternate ”zero pressure” light stropping (trailing edge strokes or “downward only then lift and repeat strokes” ) to be sure there’s no foil edge 5-6 times for each stone until you’re satisfied with the result.
Finish with a Fine Grit Stone
Repeat the steps for medium grit sharpening stone, but use a fine grit stone for a more polished edge. Seek to replace the previous stone’s scratch pattern completely by alternating sides in a balanced way using medium-light pressure, then count-down. And finally, use the alternating zero-pressure stropping strokes. Your knife should look terrific and also be VERY sharp. Congrats! Pat yourself on the back. Well done!
Don’t Dull the Knife Tip
Try very hard to precisely stop the stone BEFORE it slides off the tip of the knife as you do your strokes. This is especially important during heavier pressure using coarse stones. You will get good at stopping at about the halfway point of the width of the stone then lifting straight up. Go slow as you need to in order to execute this maneuver correctly. By doing this you protect your sharp pointy knife tips instead of rounding them off. Trust me on this.
Tape the Blade Before Clamping to Avoid Scratching
When you’re sharpening a really nice knife the last thing you want is for your sharpening process to scratch it up. While it’s entirely cosmetic, why mess up a pretty knife? A little tape on the area where the clamp goes should help avoid unwanted scratches.
Thoroughly Wipe Blade Edge Between Grit Changes
It’s a very good habit to remove all previous abrasives from the knife between grits. It’s surprising how much tiny abrasive remains and it can taint the finer grits as you progress. Keep some clean rags handy to completely wipe down or clean the edge after each stone using a fresh clean rag. Sometimes you can use a large rag by folding it, but I prefer to just discard rags after each grit to prevent cross-contamination of my finer grit stones.
Remove Residual Ink From Your Knife
Once you’ve sharpened your knife, there may be some visible ink from the marker remaining on your knife. The remaining ink is easily removed using some nail polish remover or acetone and an old rag. With the ink removed, just wash the knife and enjoy!
Have Fun!
K