A swimming pool & filter pump plumbing tip for all swimming pool owners is to avoid all glued pipes in favor of using reusable hi-temp unions. Even if you don’t do your own DIY pool service – most people don’t – this tip will make your system infinitely easier to service. When the inevitable time comes to take the filter plumbing apart to replace worn or leaky valves, motors, and other parts, it will be much faster and less expensive. The convenience factor makes the slightly more expensive installation worth it.
As a person who normally enjoys DIY and fixing broken things, serviceability is rarely engineered into products these days. It seems that repair is seldom a consideration when products are manufactured. The same seems to be true for products that require installation too. Glue, welds, or solder have displaced reusable connections. When a product fails, the expectation is that it should be excised and discarded. Never mind that the internal cause of failure is a twenty-cent electronic part. The so-called engineered obsolescence age is good for jobs and the economy some say. I call BS. But I digress.
Why Use Unions in Pool Plumbing?
The simple answer to why using Union pipe fittings in your swimming pool filter and pump plumbing is serviceability. Had my installer used Unions on my pool plumbing, I could have replaced my failed piece of equipment in minutes with zero hassle. No gluing or cutting of pipe is needed to remove and replace key components like pumps, heaters, filters, chlorinators, and the multi-port valve assembly. Instead, I merely have to loosen a threaded collar and the pipe is separated. Simple.
The Swimming Pool Plumbing
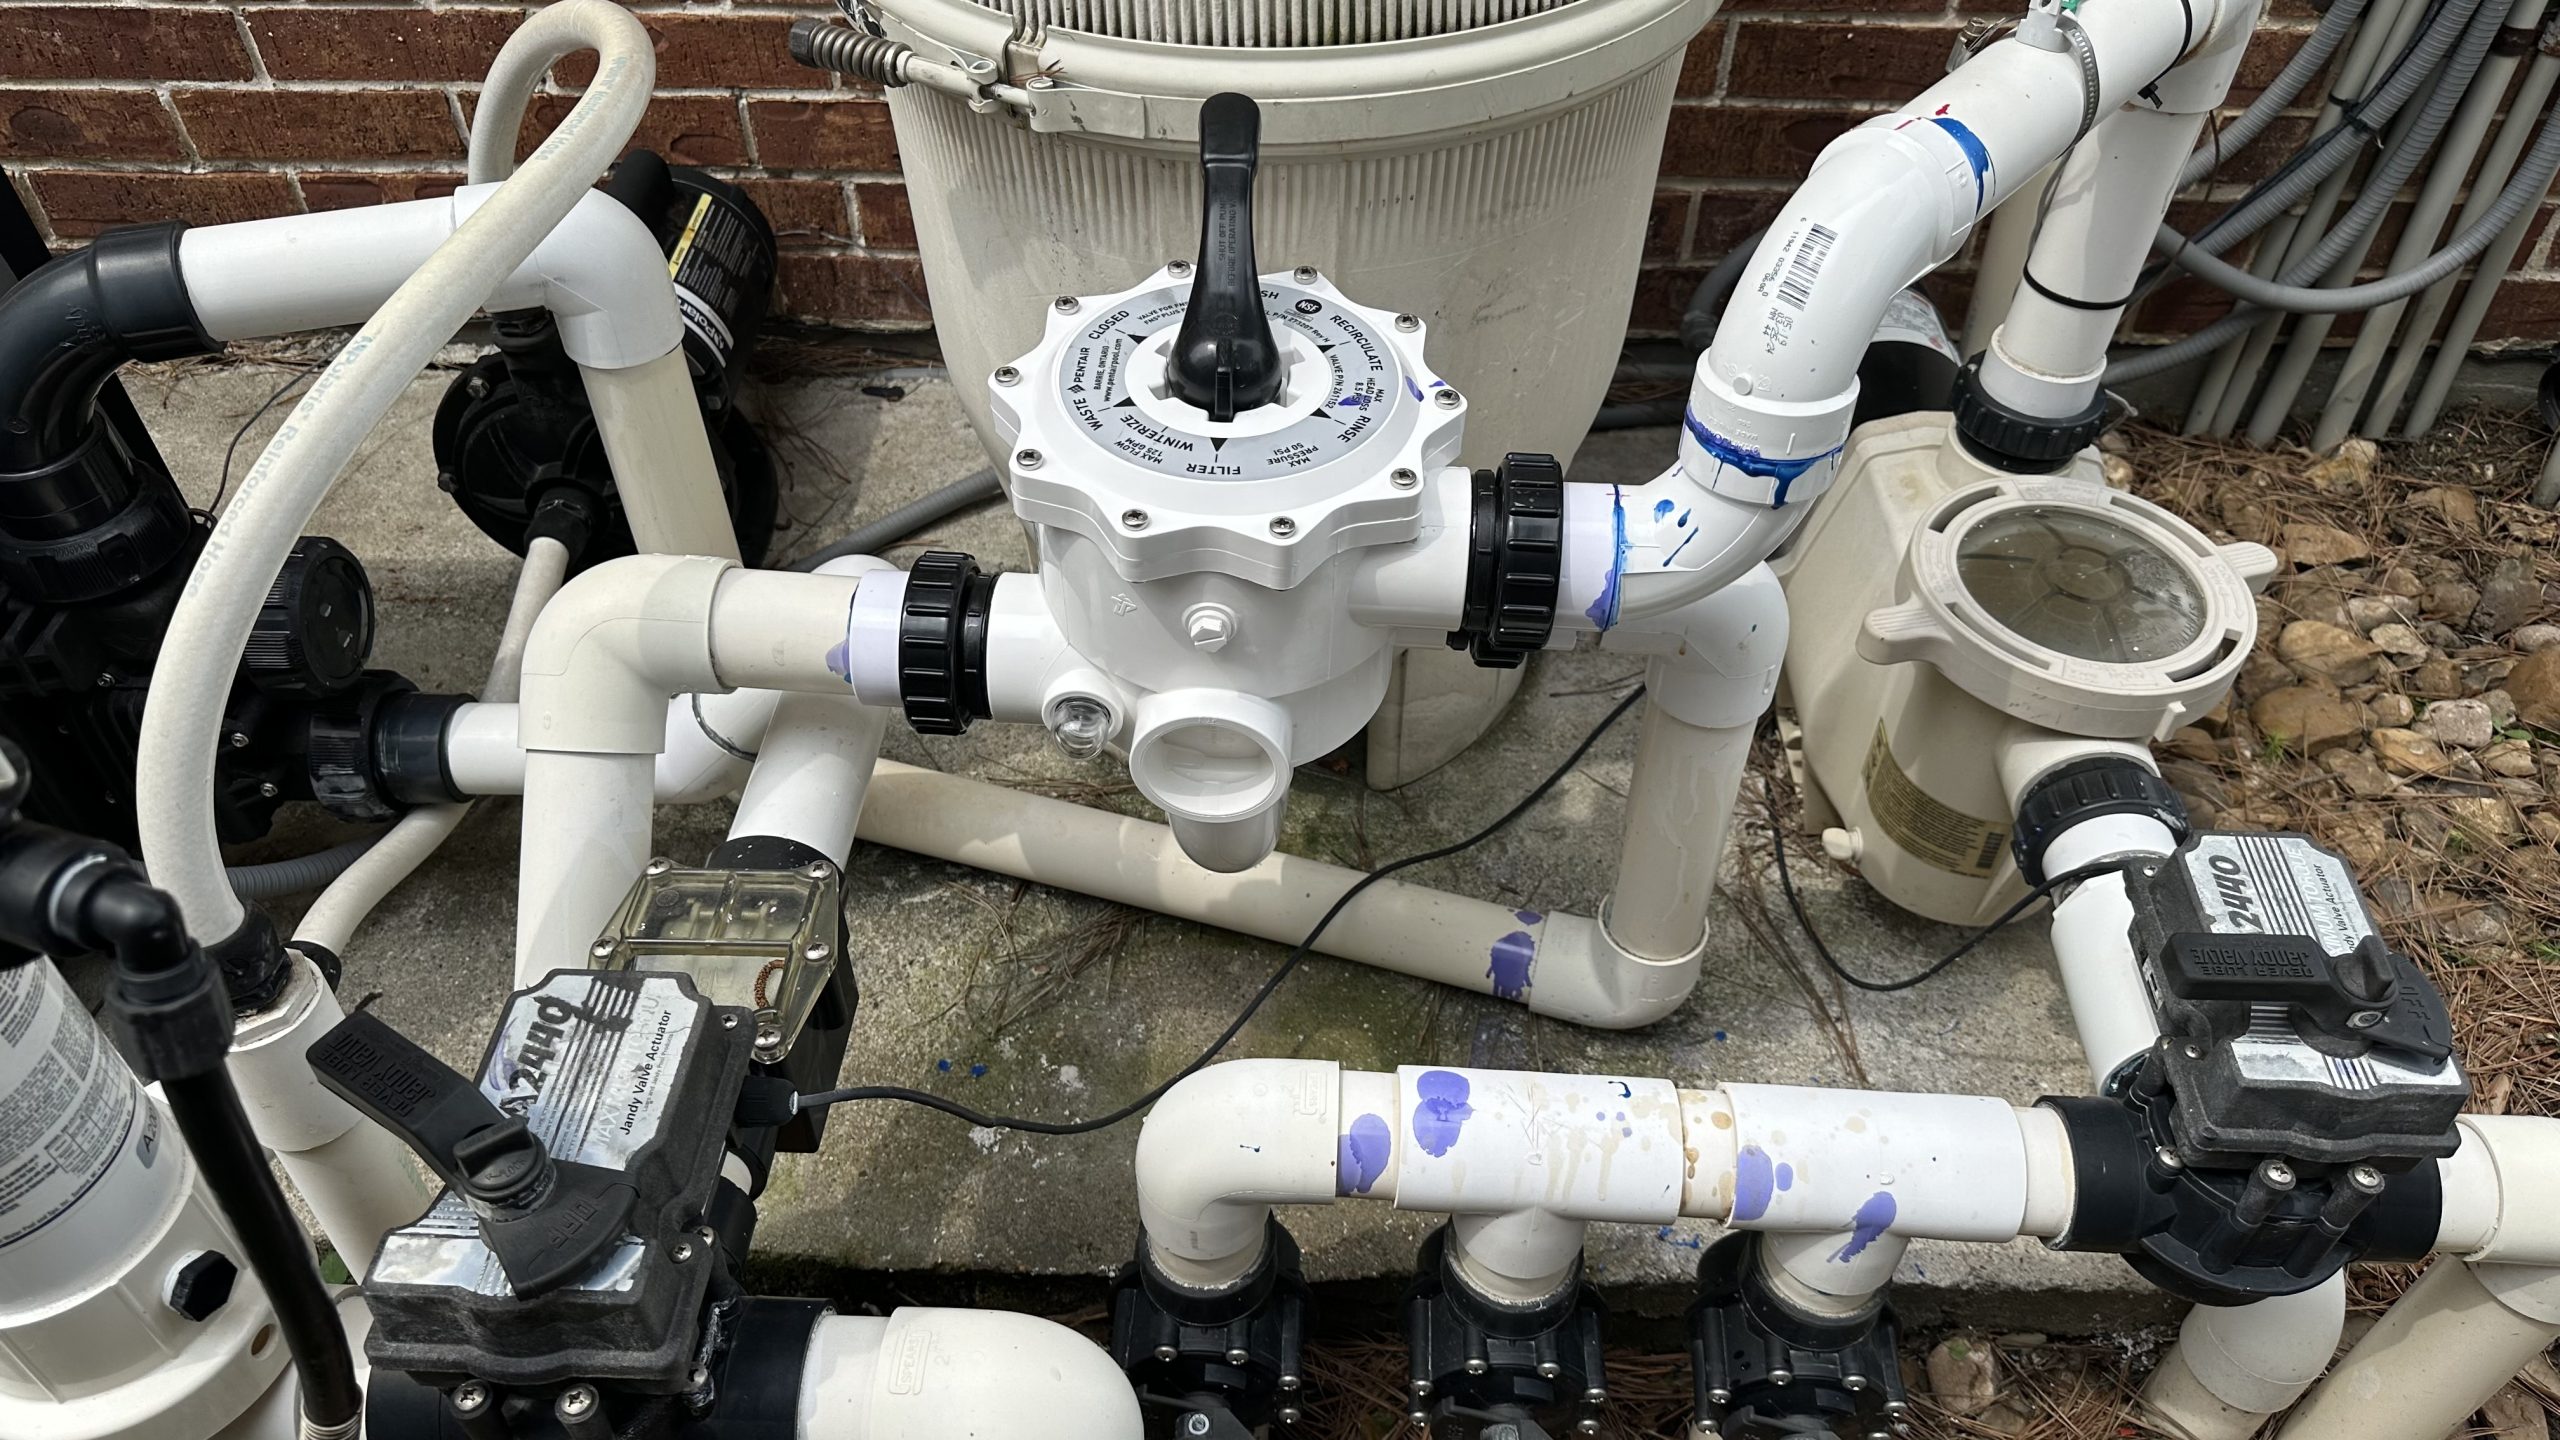
Below are some before and after photos of my 24-year-old pool filter and pump plumbing. The big multi-valve that directs the flow between everything developed a crack in the housing and had to be replaced. Since nearly all the connections were cut to size and glued into place, I had to cut the pipes to remove the defective valve.
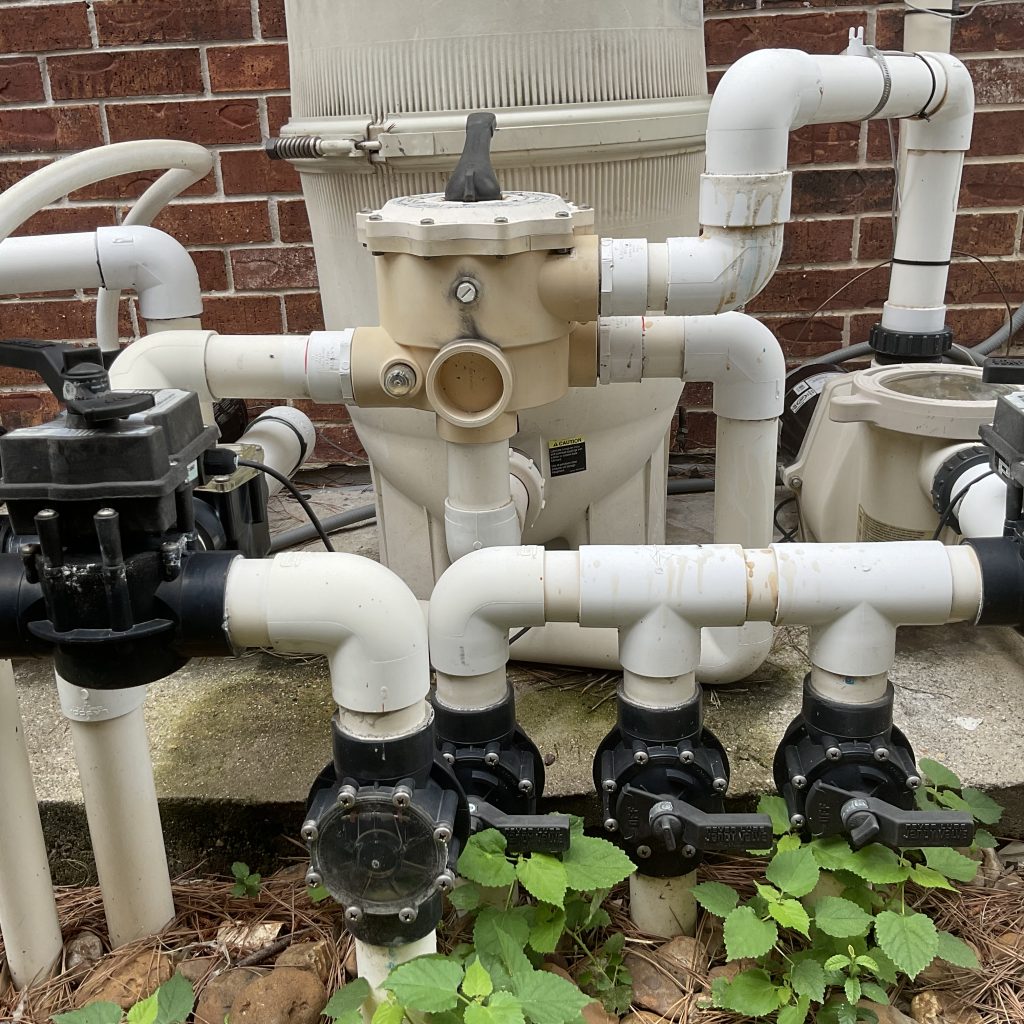
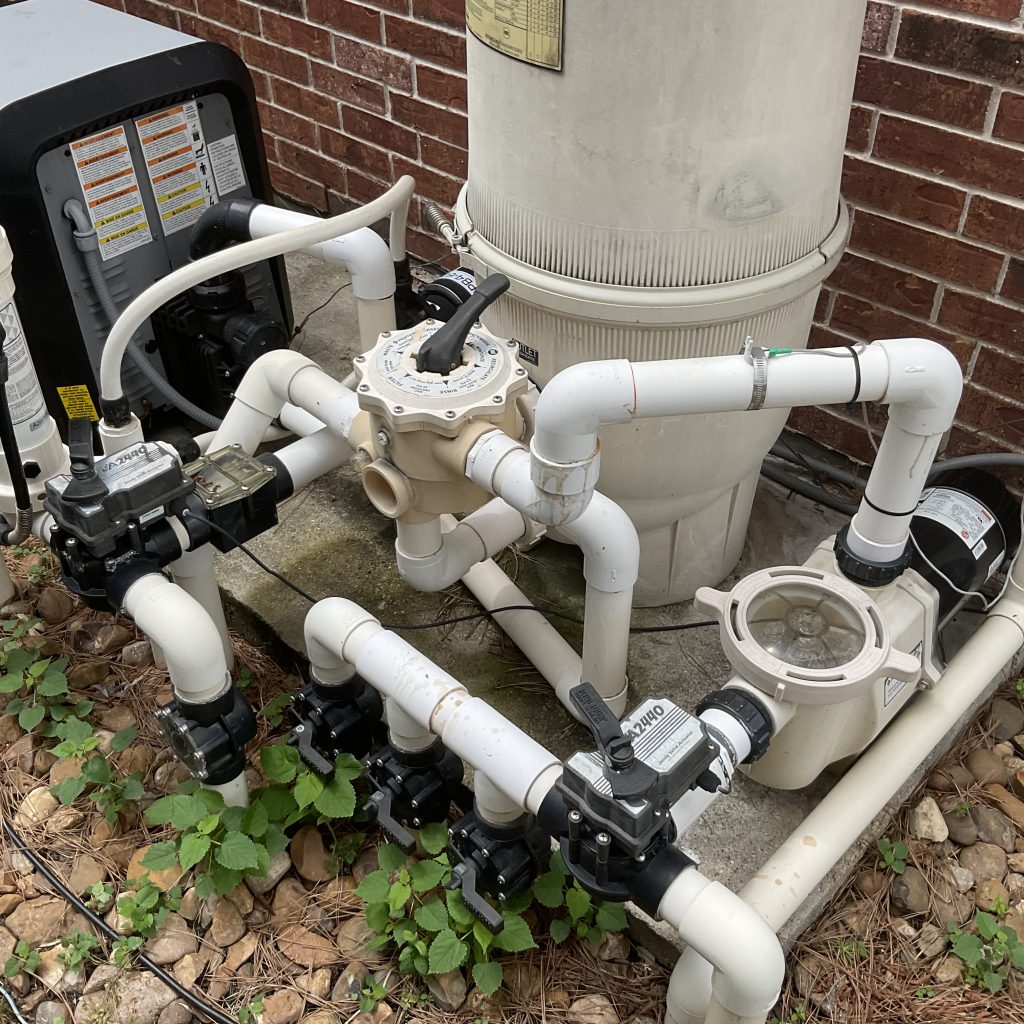
Another view of the glued pool filter and pump pipes before removing the old multi-valve. I used a reciprocating saw and fine-toothed blade to cut the pipes quickly to save time, but a hacksaw works too.
Top View of Plumbing After
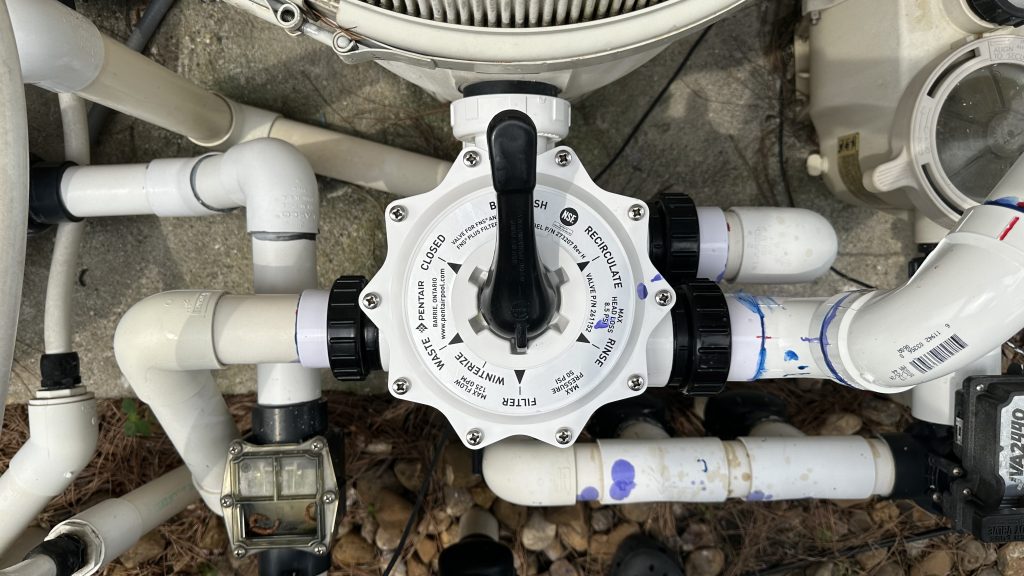
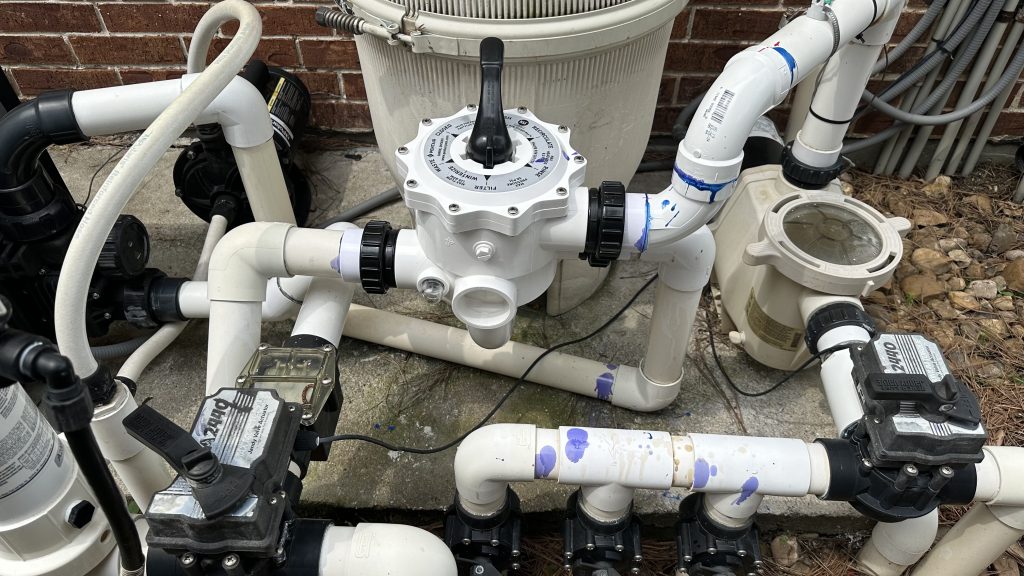
Here are a couple of photos showing the completed project. No leaks! The best part is that when any of the parts need to be serviced, it’s a trivial thing to disconnect the unions. Try as you may, you will spill PVC Primer or PVC Glue as you join the pipe bits together. It’s a messy business and you need to work quickly since the glue sets in seconds.

The Union Fittings
Below is a link to Amazon’s page for the actual union fittings I used in my pool plumbing project. You can read more about them:
https://www.amazon.com/dp/B0BVYGCG2B?ref=ppx_yo2ov_dt_b_product_details&th=1
Other Materials Used:
- Magic Lube is a brand of o-ring lubricant that is widely used and trusted in the swimming pool industry. I used this sparingly on all the o-rings just before assembly and tightening.
- Teflon Tape, 3-4 times around all the MIP pipe threads is a good practice to ensure zero leaks.
- Good quality PVC Primer and Pipe Cement
Additional Tips PVC Pool Plumbing
- Measure up carefully before cutting pipes to size, you have some wiggle room, but not a lot.
- Forget about dry fitting all the connections, it’s a waste of time. Measure and mark or tape each connection so you know how far to insert each section when gluing.
- Dry fitting will mislead you, trust that once you slather on the primer and glue the fitting will easily slide but you only have a few seconds before it sets!
- Follow directions precisely on the primer and glue. The operation is one continuous set of steps for each connection. Prime female, prime male, prime female again, glue female, glue male, insert slight twist, hold for a few seconds, done. Repeat for all cemented joints.
- The cemented jars say fully cured in 24 hours, but you can fire up your pump when you’re all connected up, the connections will hold perfectly if they were done properly.
- Use Teflon tape on all threaded MIP pipe connections. 3-4 wraps is fine.
- Magic Lube or equiv on the o-rings recommended.
- PVC DWG schedule 40 pipe can be cut using a hacksaw, a pipe cutting tool, or a reciprocating saw.
- Be methodical and take your time until you get to the gluing part! Gluing benefits from haste, but avoid puddling the primer or cement.
- You will spill some primer and glue. You just cannot help it.
- If you wish, you can paint the pipes aftwards.
That’s it folks, good luck on your project. If you’re having the work done, you now know what to look for as your service tech does your plumbing work.
K

